Hello!

Welcome to American Homestead. I'm happy you have found my blog. Make yourself comfy and see what's been happening around here. I write about the things that interest me ~ creativity, travel, food, nature and a happy life. I'd love to read your comments.
Showing posts with label quilting.. Show all posts

Sunday, February 23, 2014

Threads of Memory ~ February

Mercer County Star


We are quilting along with Barbara Brackman's
Block of the Month, Threads of Memory.

http://civilwarquilts.blogspot.com

This is how I made my block, it may
differ from the original.


Fabric Requirements:

Fabric A: Red print
4 - 4 1/2''squares

Fabric B: Green
1 - 6'' square 

Fabric C: Large Light Print
2 - 6'' squares - Mark a 
diagonal line on back.

Fabric D: Blue
1 - 6'' square

Fabric E: Small Light Print
4 - 1 1/2'' squares
4 - 1 1/2'' x 2 1/2'' rectangles

Fabric F: Red
8 - 1 1/2'' squares - Mark a 
diagonal line on back.

Fabric G: Fussy Cut
1 - 2 1/2'' square

Make Small Center Star: 


Make Flying Geese Units:

Place a Fabric F 1 1/2'' square on left
side of a Fabric E rectangles and sew
a thread width below drawn line.  Open
and press to the corner, trim back 2 
layers of fabric to 1/4''.


Repeat process on the right side of 
rectangle.  Make 4 of this unit.


Layout units as shown and sew
together in 3 rows.  Press seams 
in rows 1 and 3 to the outside and
seams in row 2 to the inside.


Sew rows together and square to 4 1/2''.


Make Quarter Square Triangles
(Outer Center Units)

Pair 6'' squares in the following combinations
with right sides together:
1 - B/C    1 - C/D
Sew 1/4'' away from each side of drawn line,
cut on drawn line and press seams to the
Fabrics B and D.  On the Fabric B/C units,
mark a diagonal line on the opposite
diagonal from the seam.


Pair a B/C unit with a C/D unit with
right sides together as shown.  Be 
sure to have seams lock against each 
other.  Sew 1/4'' away from each side 
of drawn line, cut on drawn line and
press seam open to reduce bulk.


Squaring a Quarter Square Triangle is easy 
if you follow the directions!  Place the diagonal
line of the ruler along the seam line as shown.
Since we want a 4 1/2'' square, place the 2 1/4''
intersection at the center of block (as shown
with the arrow), now trim the top and right 
seams.  


Rotate the unit and place the 4 1/2''
lines of the ruler along the left and bottom
edges and trim the remaining untrimmed
edges.  Make 4 of this unit.


Layout units as shown and sew together
in 3 rows.  Press seams in rows 1 and 3
to the outside and seams in row 2 to the 
inside.


Sew rows together and press final seams
open to reduce bulk.  Square to 12 1/2''.

Check out everyone's work on Dustin's Flickr site:
http://www.flickr.com/groups/threadsofmemory/#

If you like what you see here, please
become a follower of this blog and leave a 
comment, let me know you are out there!
~ Ellen


Saturday, July 20, 2013

Honoring Women's Rights ~ Week 47

Heroine's Choice
And A Feltwork Tutorial
 
 
We are following along with Barbara Brackman's
Block of the Week, Grandmother's Choice.


I like to use felt for applique.  I design
feltwork patterns ~
 
 
and thought this would be a good chance to try
a design that was 8 1/2''.
 
 
So here is a little free feltwork tutorial
for this week!
I start by determining the size I would
like the piece to be and marking that
measure along the fold of a folded piece
of construction paper.  I then sketch the
design and cut it out and when you open
the folded paper...
 
 
... you have your designs.  I used a circle
template for the 1 1/4'' circle and for the
flower shape, this pattern was just slightly
larger than a piece from my
 
 
Serendipity pattern so I made it larger.
 
 
It is a good idea to lay it all out prior
to cutting your pieces to be sure it all
fits well.
 
 
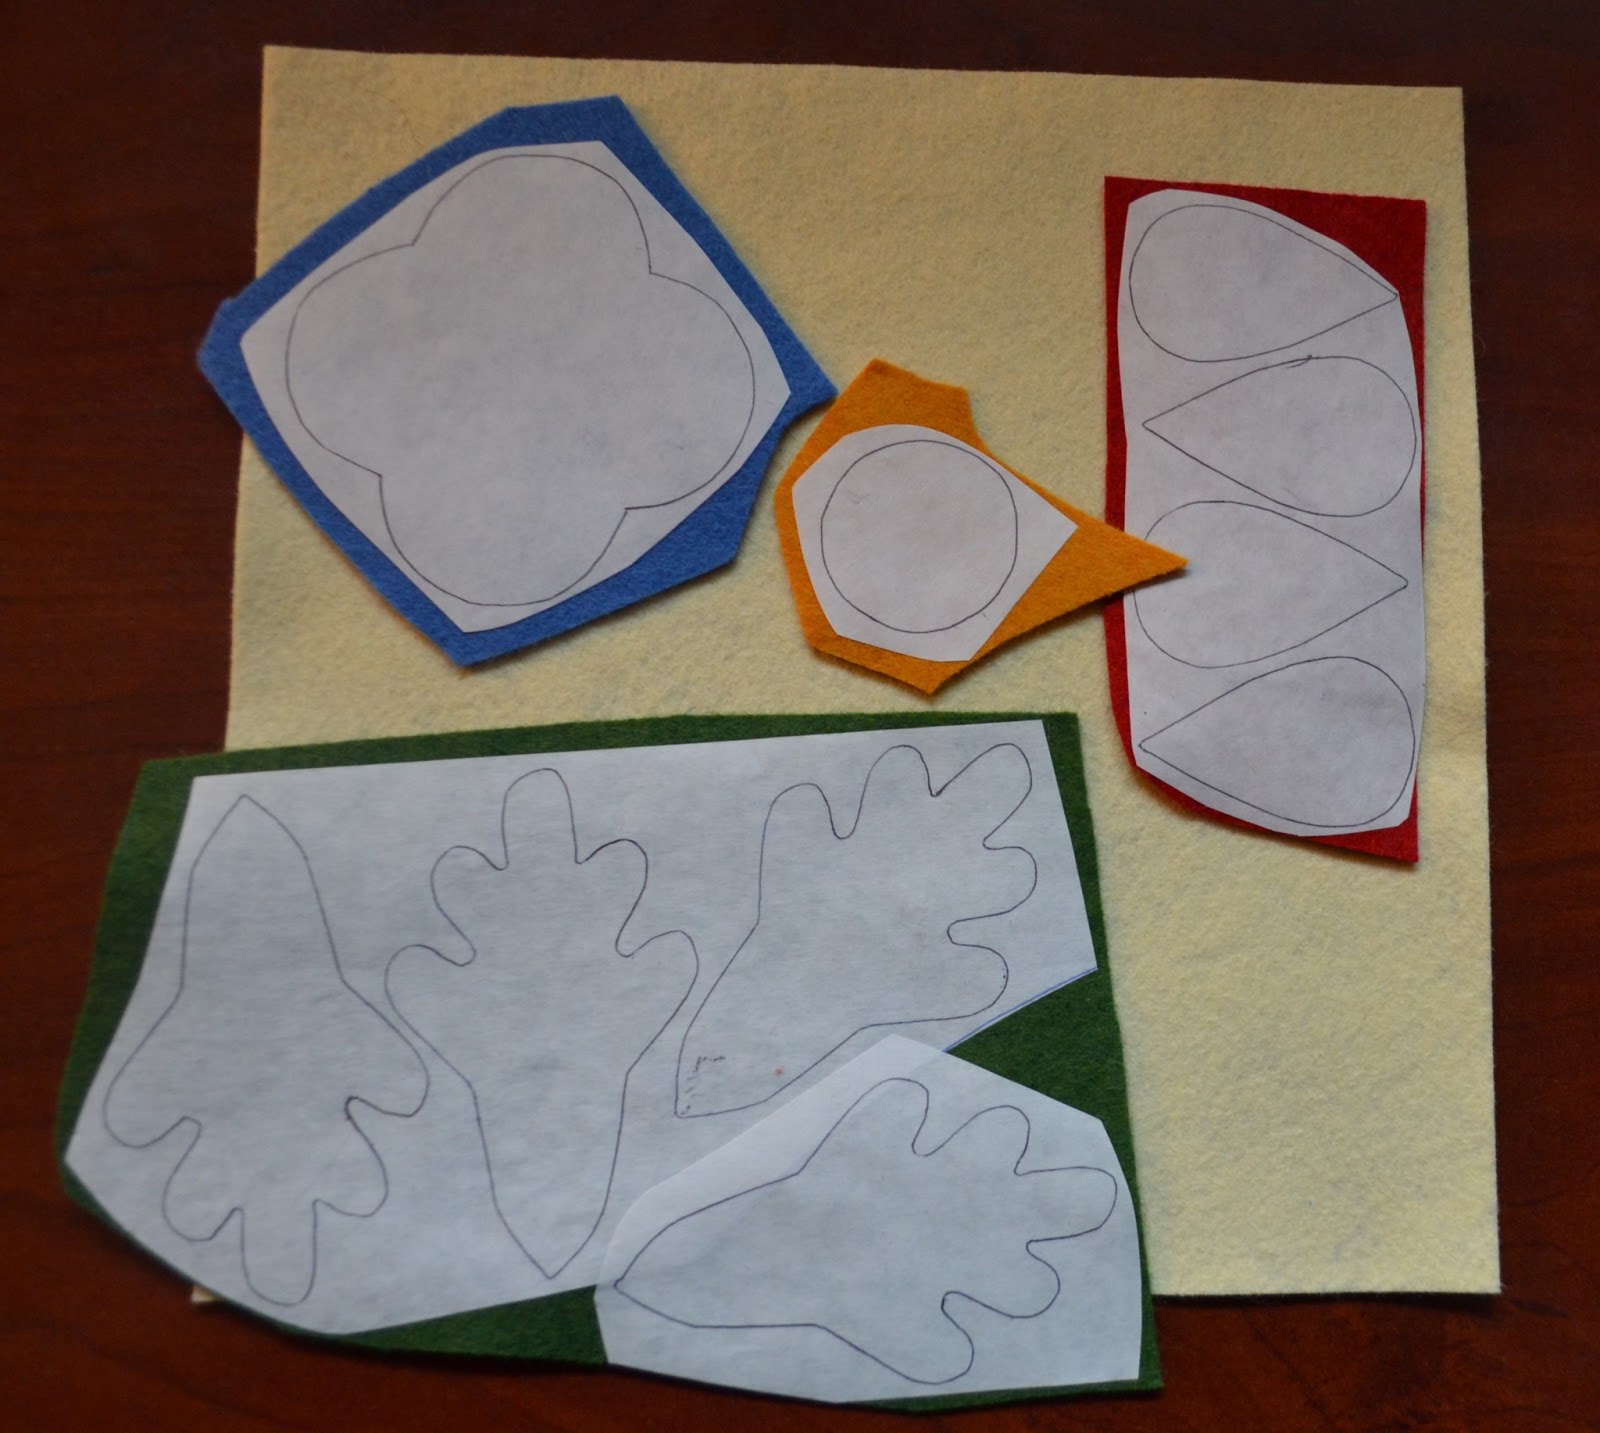
Here are my pattern pieces, just enlarge
the white area until it measures 8 1/2''
across.  At this point I transfer the designs
to poster board and cut them out since this
makes tracing more stable but if you are
only making one, you could trace the
construction paper shapes if you are careful.
 
 
Trace onto the dull side of freezer paper.
( If I have scraps left over from bigger
projects I save them and use them for
small pieces like this project.)
 
 
Press the shapes onto good quality felt.
I use a 20% wool/80% rayon felt from
National Nonwovens that is excellent
quality and the colors are fabulous.
This is nothing like the 5/$1 craft felt.
 
 
Cut out the pieces and pin to your 8 1/2''
background piece. 
 
 
I whip stitched all the pieces in place using
a matching embroidery floss.  I then added
some additional stitching to the center using
very simple embroidery stitches such as, the
French Knot and the Lazy Daisy stitch.
 
 
I'll be hanging this piece somewhere in
my house.  I hope you will give felt applique
a chance, it is fast, easy & fun.
 
Checkout everyone's work on Dustin's Flickr site:
 
American Homestead
is now on Facebook.
Please "like" my page!
 

Monday, June 3, 2013

Dixie Diary ~ May

Tokens of Dried Roses
 
 
We are quilting along with Barbara Brackman's
Block of the Month, Dixie Diary.
 
 
In early May when this block came out,
I was hiking up to mountaintop castles
in Germany,  Now I'm back home and
thought, better late than never...
 
 
Fabric Requirements:
 
Fabric A: Blue
1 - 6 1/8'' square
 
Fabric B: White print
4 - 4 1/2'' squares
1 - 5 1/4'' square, cut on the diagonal twice
 
Fabric C: Red
2 - 5 1/4'' squares, cut on the diagonal twice
 
 
Step 1:
Sew the long side of a Fabric C Triangle to one
side of a Fabric B square.  Press seam to the
Fabric C and trim the dog ears.
 
Then repeat this step to a side right next to this
on the Fabric B square as shown.  Press seam to
the Fabric C and trim.
 
Make 4 of these units.
 
 
Step 2:
Sew a Fabric B triangle to each side of
the above unit.  Press seams to the Fabric B.
Make 2 of these triangle units.
 
 
Step 3:
Sew a unit from step 1 to opposite sides
of  the Fabric A square. Press seams to
the center.
 
 
Assemble Block:
 
Sew a triangle unit from Step 2 to each side
of the unit from Step 3, matching seams.
Press seams to the outside.
Square to 12 1/2''.
 
 
I added the border and applique star to mine.
 
 
American Homestead can
now be found on Facebook.
Please "like" my page.


Sunday, April 21, 2013

Coffee, Tea or Me?

 
On Sunday mornings I usually post a quilt
tutorial as I follow along with Barbara Brackman's
Block of the Week, Grandmother's Choice.
 
I'm a bit late to the party, but I finally have the
"crud"  that everyone else has been suffering
with throughout this long winter.  Chills, fever,
body aches, etc.  All I can think about is I am
leaving for the big European vacation in 9 days
and I HAVE to get better...  So, this is as close to
a coffee cup (this week's quilt block) as I will get
today. 
 
Oh well, I have never had a cup of coffee anyway...
 
~ Ellen


Wednesday, October 31, 2012

Market Report

 
Here are some more photos from the
Fall 2012 International Quilt Market.


It was a great adventure!


Sunday, September 9, 2012

Honoring Women's Rights ~ Week 2

Amethyst
 
 
We are quilting along with Barbara Brackman's
Block of the Week, Grandmother's Choice.
 
 
I must state, I am a quilter that says,
WHY? to Y seams...
I despise them, and generally avoid them like the
plague.  As of last night I had decided to skip this
week's block but woke up at 4:30 this morning and
decided to give it a go. 
 
 
I could not get the provided link to size up
correctly so I used EQ7.  Search in the Block
Library for the Priscilla block (there are at
least 9 of them) and select one.  From your
Quilt worktable, click on your select tool and
click on the block.  Click File>Print>Templates
and choose your block size.  Click Print Seam
Allowance and Print.
Cut your fabric using the templates.
 
If you should not have access to EQ, check the
Flickr site and there may be someone there who
can help with getting the right size from the link.
 
 
Layout pieces as shown.
 
 
Sew together in 3 units, press seams in
center unit to the outside and seams in
outer units to the inside.
 
 
So this is what we are going to do.
I'll show you how in the next steps.
 
 
Line up the center section as shown and
sew from seam line to seam line.
 
 
Pivot the fabric so the seams on the
left side match up and sew from edge
to seam line.  Repeat on other side.
 
 
Now go reward yourself for making
it through the Y seams.
 
It is so much fun seeing people from all over
the world participating in this project, please
become a follower to my blog!  We are all one
in this world of quilting.
 
Check out the Flickr site where everyone can
post their work:
Good Luck and see you next Sunday!