
A Pincushion Tutorial

You will need for 1 pincushion:
2 - 6" diameters circles of fabric
1 - 5" diameters circle of fabric
48" of 6 strand embroidery thread
1 1/2" diameter circle of felt
fiberfill
button

Making the Yo-yo:
Cut a 5" diameter circle of
fabric for the yo-yo.

Using a doubled knotted sewing thread
make a few small stitches in the same
place to lock the thread so the knot will
not pull through when you gather the
yo-yo. Now sew 1/8" from the edge of
the fabric using a 3/8" running stitch.
When making yo-yos remember if you
make large running stitches the hole will
be small, but if you use small running
stitches the hole will be large.

Pull thread to form the yo-yo. Once
you can't gather anymore, take a few
small locking stitches and knot securely.
Flatten out and use your fingers to
make the yo-yo gathers look even.

Making the pincushion:
Cut 2 - 6" diameter circles of
fabric for the body of the pincushion.

With right sides together, machine
stitch 1/4" away from edge, locking
stitches at the beginning and end.

Grab each of the circles and pull
apart, then make a 1" slit in
the center of one circle.

Turn right side out through the slit
and press. If your edges are not
flat, stick a chopstick in the slit
and run it around the sewn seam,
press again.

Stuff with fiberfill very tightly
and hand stitch the slit closed.

Thread a large needle with embroidery
floss and make a large knot in one
end. Make a few small stitches in
center of back, then bring needle
from back to front in the center
of the pincushion.

Wrap floss around circle and
bring needle up from the bottom
again to the top, pull to make an
indent in the side. Repeat to
opposite side.

Keep repeating this process
until your pincushion looks
like it has 6 pie wedges.
Then bring the needle up and
down through the center a few
times and then knot in the back
but do not cut the floss.
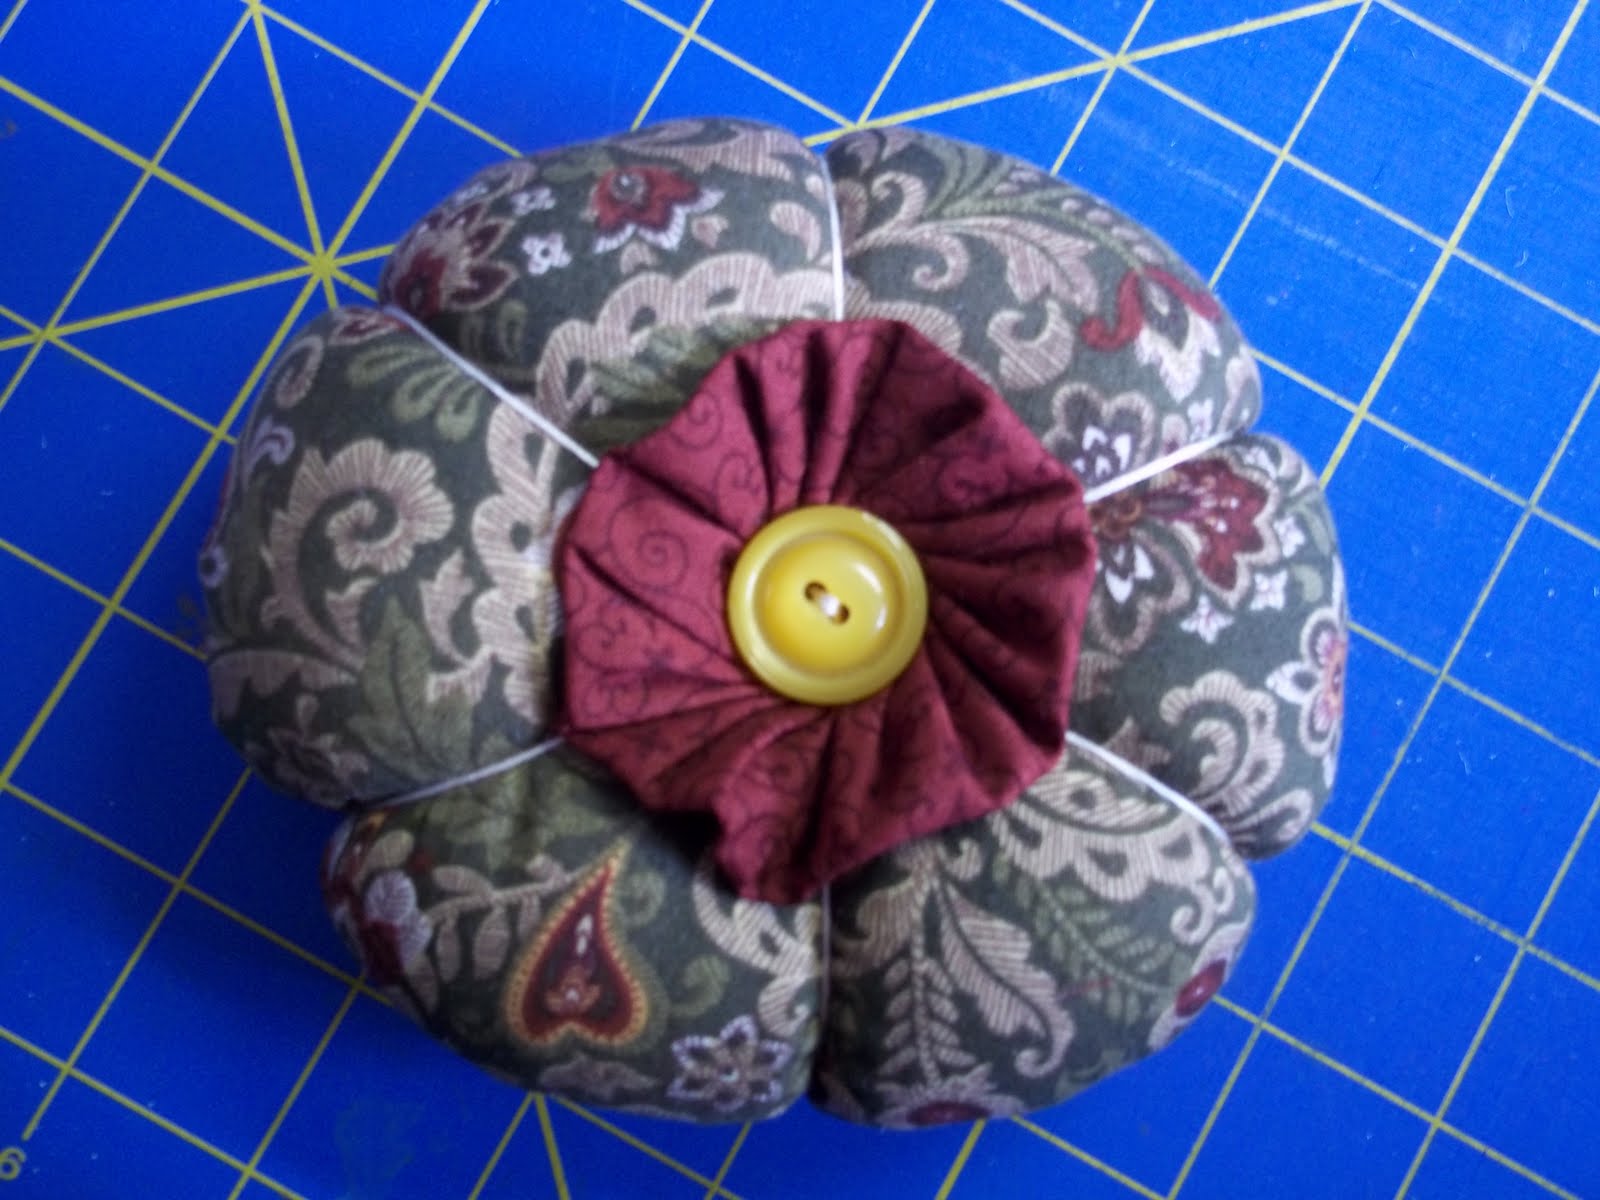
Bring needle up to top again
and place yo-yo and button
as shown. Take several stiches
through button, yo-yo and pincushion
to secure, then make a secure
knot in back.

Place felt circle over slit in
center of back and whip
stitch in place.

Thankyou for the tutorial, it is a lovely little pincushion!!!
ReplyDeleteOhh, I made some only with a button but it looks nicer with a yo-yo underneath!! Good idea!! Yours are looking very nice!!
ReplyDelete